
When installing hardwood flooring in your home, flooring experts recommend that you buy 7 - 10% extra wood for waste cuts. Of course, not all of that wood is going to be used, leaving you with some leftovers. Don’t let those boxes clutter your garage for an indefinite amount of time; put those leftover planks to use with these 3 cost-effective ideas that can add a unique flair to your home.
1. MAKE A TABLETOP
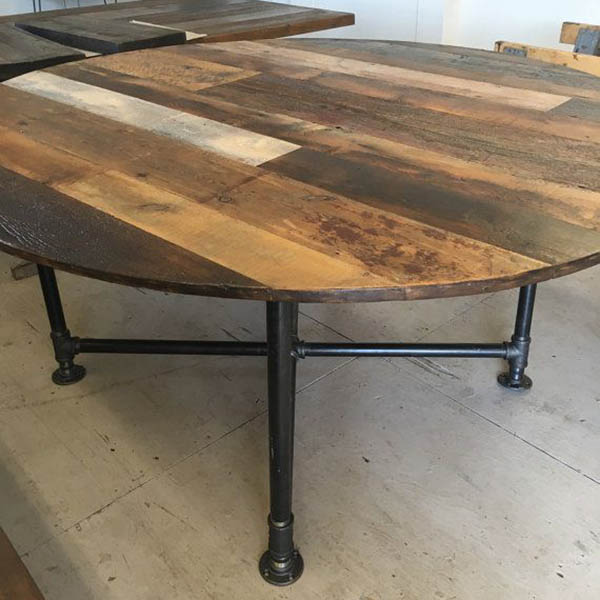
Looking to jazz up your kitchen table? This is a fun DIY project that can be done over the course of a weekend. Depending on the look you want, this project works for both square and rounded tables. Begin by trimming planks to desired length and width. Next, prep the pieces together to ensure all planks align for the desired look. Using wood glue, work quickly to piece the planks together. Have a wet paper towel on hand to wipe away any excess glue. Use bar clamps to hold the tabletop together for at least 24 hours. Once completely dry, use a scraper and sander to smooth away any excess glue. This is the final step for square tables. Add trimming if desire. For a round table, use a router and circle jig to shape.
2. INSTALL THEM AS WAINSCOTING
Perfect for a smaller room, leftover wood planks can be used as wainscoting. Wainscoting adds a unique, classic design to any room. Begin by removing baseboards and trimming planks to desired width and length. Some may like the look of the wood untouched and others may want the wood a certain color of paint. If painting, allow 3-4 days for drying before gluing and nailing to the wall. Attach to the wall using a level and a construction adhesive like Liquid Nails. Using a stud finder, locate and mark all studs in the area that you plan on adding wainscoting. Squeeze adhesive to the back of a plank and attach it to the wall. Nail at a 45-degree angle through the tongue to a stud. Repeat this process until you reach your desired look. Reinstall the baseboard and attach trim if desired.

(Photo courtesy of Don Pedro)
3. COVER A CEILING OR ACCENT WALL
More and more homes today are featuring solid wood walls or ceilings as a unique architectural design element. Accent walls or ceilings add a focal point in any space. The tools you will need for this project are your leftover wood planks, jigsaw, screwdriver, nail gun with brad nails, and Liquid Nails glue with a caulking gun. Start by measuring the ceiling or wall you plan on attaching planks too. Using a stud finder, locate all studs. Mark all of these studs horizontally and vertically, making a reference grid on your wall or ceiling. Next, rack your boards to get a general idea of where they will go. You will more than likely need to cut some of the planks to fit into the space. Now it is time to start gluing onto the wall or ceiling. Squirt the Liquid Nails onto the back of the board and attach to the wall or ceiling, starting at an edge. Once glued down, use a nail gun to nail the boards through the tongue at a 45-degree angle to a stud. Repeat these steps with the rest of the boards. You may have to cut pieces down to fit. Use a mallet to gently tap each board as close as possible to the adjoining board. Add baseboards or molding as desired.
If you like this look but don't have any excess wood flooring then you can buy specialty cut wood for this project here.

