Many people who want to add an interior wall somewhere in their home think that they need to reach out to a contracting team to do the work, but it is actually pretty easy to do on your own. It is important to note that the intended wall is a non-weight-bearing wall. You can’t put much of a platform on top of them or any significant weight on these walls.
Follow our guide to add some privacy or visual interest to your home. Be sure to read through everything and always ensure that safety is at the forefront of your concerns. You want to guarantee that you have all of your supplies and everything is ready to go. You don't want to have to stop working in the middle of your project to get what you need.
So, let’s find out how to DIY your next interior wall together, shall we?
Prep Work to Build an Interior Wall
Depending on the type of project you are working on, you may need to do some prep work to expose an existing wall, peel away molding or parts of the floor, or move some design features before starting. You need to ensure that the new wall connects to an existing wall or falls directly under a ceiling joist. If it doesn’t, you will have to prep that area by installing nailing blocks instead.
The interior “skeleton” of the wall needs to have vertical studs and top plates unless the wall will contain plumbing or electrical work. All of that should be completed (by a professional) before you start working on your wall.
How to Frame Out an Interior Wall
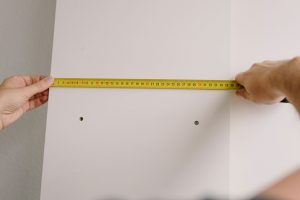
To start, first, locate where your wall will be and find the centerline across the ceiling. Then measure and mark it out. You may want to take a few steps back and look at it from different directions to ensure you like the placement. Use chalk, so it’s easy to remove.
Place one stud at the end of the line and, if it is going to meet a wall, find the stud. You want to measure about 15.25 inches from the intermediate stud.
Lay the top and bottom plates for the wall side by side on the floor, and then measure where they will go. Mark a perpendicular line and use a combination square so that the studs align perfectly. Check and recheck your work to avoid any mistakes.
Connect the Interior Wall to The Ceiling
Your next step is to locate the joists in the ceiling and then hold the top plate in position. You may want to get some help from someone who can look at the alignment from the ground and ensure that everything is running parallel. Hold the top plate along your guide on the ceiling and put a nail through the ceiling material and into each joist using nails that are at least 3.5 inches.
To install the top plate, hang a plumb bob to help establish the bottom plate’s location. This will ensure that your wall is straight and strong enough to stand. Use a chalk line on the floor to help you out when you get there, especially if you are going to be working alone. Then, nail the plate with longer three-inch nails that are staggered to about every 16 inches.
Connect the Interior Wall to The Floor
Next, use some stud-framing clips to install the wall studs. You will have to use some force to lift the stud into position and line it up with the top and bottom plates. This is a place where you want to check and recheck to ensure perfection. Use a level to ensure that everything lines up and nail it into place. Put a little bit of force on the wall to see if it stays.
Attach the Wall Studs
Attach each wall stud using the nails. Be sure to check the connections and corners once again. If there are two walls intersecting each other, double the studs to receive the wall. If in doubt, use another stud to ensure that everything is secure. If your new wall is going to have a corner, use two full-length studs that utilize blocks.
Decorate Your Wall
Now for the fun part! Next up, you want to decorate your wall and coordinate it with the rest of your house. You can prep and paint the drywall like you would any other wall, or you can decorate it with paneling or something else to make it really pop. A lot of people will do this by using complimentary wood paneling or something with a funky tile pattern that they may not want on the rest of their walls, but they can do that on a wall they built themselves. You can go subtle or go bold. The choice is entirely yours!
In Conclusion
The best part about all of this is that you can absolutely build an interior wall with drywall or paneling in just an afternoon. It may take a bit of patience, and it’s always easier to line things up and lift materials if you have someone else helping you out, but it isn’t an impossible task to create your wall solo.
Take a deep breath and plan everything out as best you can. It’s also best to work with high-quality materials, always measure as much as you can, and focus on the task at hand. And before you know it, you’ll have a beautifully designed interior wall made with drywall or paneling that complements your home in more ways than one!
Sources:
What Is Behind Drywall: Guide to Wall Studs and Framing Lee Wallender | The Spruce
