The day has finally arrived, hardwood installation day! While it may seem like a laborious day filled with hard work, have no fear. Hardwood Bargains is here to put your mind at ease and create a smooth and seamless transition for your well-deserved home or business renovation.
By following the steps below, applying vinyl flooring will be much easier than you originally anticipated. So, sit back, relax, and read on to gather all the necessary, yet easy, steps you need to follow to make this process smooth sailing.
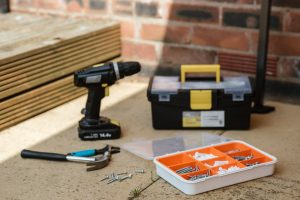
These are the Tools You Need
Before we begin, make sure you have the following tools handy. You’ll most definitely be needing them throughout this process!
- Crowbar
- Pen
- Paper
- Chalk
- Level
- Vinyl Flooring
- Plywood
- Masking Tape
- Putty Knife
- Builders Paper
Now without further ado, let’s officially begin!
Sketch Out the Room
First, it’s super important to visualize the space before starting on a major renovation. Start by grabbing your pen and paper to sketch the room and where the vinyl is planned to be installed. Not only will you get a better visual of the space, but this will also ensure that you have enough product for the installation.
Make sure to incorporate the measurements into your drawings, and plan to have a little extra material on hand for cutting just in case you need it down the line. This first step alone will help set you up for success and eliminate any possible surprises later. After all, no one likes to run short on materials right in the middle of a project!
Pay Attention To the Subfloor
In this next step, it’s vital to check the status of the subfloor and see if it’s in good condition before any renovations take place.
A subfloor is best defined as the foundation of the initial floor or building.
This part of the floor must be flat and smooth for the rest of the project to proceed without a hitch. A smooth floor will also eliminate future damage and elongate the life of the floor. For concrete subfloors, in particular, make sure to fill any holes with a patching compound that has the smooth consistency of mayonnaise. This will guarantee proper protection of the floors.
- Important note: Wait until the compound is completely dry before moving on to any next steps!
Cut the Vinyl Pieces
Now it’s time to cut the vinyl flooring. Start by taking out the vinyl and laying it out in the room to see exactly how it will fit. Once you examine where the excess materials will be, feel free to cut it away using a sharp knife or shears.
If you happen to have any excess, be sure to save it! You never know how it may come in handy down the line when it comes to using it to redo a closet or even a small bathroom space/hall.
Extra Tip: When corners or excess material is cut, be sure it’s stuck to the ground so that it doesn’t move around. A floor that slides before final installation could cause future measurement errors that will result in needing more material.
Lay out the Vinyl Flooring
Once the vinyl flooring has been cut to your liking and sized properly, make sure to lay out the vinyl once more for a final look. If there is excess around the wall, that’s okay! In this step, you’re going to make relief cuts around these areas to get them out of the way of other obstacles.
- Pro Tip: If you have an inside corner that needs trimmed, be sure to make small half-circles in the vinyl. This will help the vinyl lay flat on the floor. If you happen to have an outside corner, do the opposite, and make straight relief cuts for the vinyl to lay flat on the floor.
Pay Attention To the First Row
Set yourself up for success right from the start! When laying out vinyl flooring or any type of flooring, it’s most important to get the first row laid down correctly. It will ensure that you are on the right track to a successfully completed project.
During the layout of the first row, make sure to slice the top of the vinyl planks using a sharp blade. The first plank needs to be set in place on the first line with the area of the cut laying up against the wall. This will ensure that you’re maintaining an extension gap.
When you move onto the next row, be sure to hold the next plank at a slight angle next to a previous plank in order to click in place. Repeat as necessary as you continue to move across the floor.
Utilize Builders Paper
Builder’s paper is a great material to utilize when laying out the flooring initially. First, make sure to roll away the vinyl flooring next to the wall area as a way to expose the subfloor. This creates a great template for the floor, so you’re able to make the exact cuts that you need for the measurements to be precise.
- Pro Tip: Simply roll out the paper to flow along the wall. Look for paper that rolls out lengthwise so that you don’t have to tape single sheets together.
Also, be sure that this step is done extra carefully, and avoid any extra sliding where it can throw off the initial measurements.
Double Stick Tape Comes in Handy
And this is where double-stick tape plays a major part – when it comes to the builder’s paper. Place the builder’s paper up against the wall, and tape it down to the floor as you move across the wall. Ideally, two feet apart is a good separation from each piece across the space.
When you’re ready to remove it, go down the line and remove the backing from the top side of the tape to avoid any tears.
Roll Back and Cut Vinyl
Now it’s time to roll the vinyl back into the position you need. Make sure it goes directly over the template you created for a perfect fit! Then you’re going to press it down to stick the vinyl to the template.
Once you stick it down, then carefully lift up the vinyl to show that it is now sticking to the vinyl backing. This will ultimately provide a visual of where the vinyl should be cut next yet, which is on the outer edge of the paper.
After this step is complete, no further cutting will be needed, and it will be smooth sailing from here! The hardest part is now simply over.
Apply Adhesive and Attach
All that needs to be done now is to attach the adhesive. Start with the perimeter of the room. Crack open the can of adhesive material and then spread a line of the product along the wall, totaling the width to be nearly six inches wide.
Then the vinyl can be attached to the adhesive. Slowly lay the vinyl back down into its original position, and use a hand roller to make it nice and flat as it sticks to the adhesive.
- Pro Tip: If you’re looking to save extra cash, don’t worry about using a hand roller. Instead, use a block of wood wrapped in a cloth to do the same trick.
Allow the adhesive on the vinyl flooring to dry for up to four hours. The longer amount of time that is given to dry, the better the vinyl will stick to the adhesive. Also, be sure to not walk on the floor or move furniture onto the surface for a total of 24 hours.
Finish it Off
Once complete, now it’s time to replace any moldings or trim that was removed before this process began. Then clean the area with a broom and damp mop to get rid of an excess adhesive or debris that came about during the installation process.
Lastly, it’s now officially time to begin the super fun part, decorating! You now have a space with a whole new look and a vibe that you can now dress up to be your personalized space.
Voila, Now You’re Finished!
And just like that, you’re all finished with your amazing DIY renovation! In these simple steps, you were able to remove, replace, and decorate your new space, and all it took was a day or two worth of work.
New flooring has the potential to instantly change the look of the room and increase the overall value of a home. And what time is better than right now to start the renovation process? We simply can’t think of one, so go for it!
Sources:
How to Install Vinyl Flooring | how-tos | DIY
Install Plywood Underlayment for Vinyl Flooring | Extreme How-To
