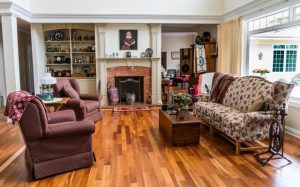
Everyone wants a beautiful, gleaming wood floor. But what happens when that floor becomes damaged? Since wood is a porous natural material, it's not impenetrable. You can easily end up with a floor that's scratched, dented, scuffed, or cracked.
While some people love these imperfections and think they add character, others want to repair the floor so that they end up with that ideal smooth surface once again.
Thankfully, all of these issues can be fixed, as long as you know how. Here's a step-by-step guide to several different types of repairs.
Cracked Floorboards
Cracked floorboards not only look unsightly, but they provide a place for dirt, debris, and water to sneak under the floor, causing additional damage. Over time, the floorboards nearby may become subject to bending or bowing, especially if water manages to get in and pool on the subfloor. To prevent this, you must repair those cracks as soon as possible.
Gather Your Supplies
Depending on the overall size of the crack, you'll need either wood putty or caulk. Use the wood putty for smaller cracks and the caulk for larger and wider ones. You'll also need a putty knife, sandpaper, a caulking gun (if using caulk), and a damp rag to wipe away any excess.
Make the Repair
Start by clearing any dirt or debris out of the cracked part of the floor. You can use any implements that will help, such as a toothbrush, toothpick, or any other small, thin tool. The goal is to remove anything you don't want to be trapped in the crack after the repair.
Next, it's time to clean the area of the floor around and in the crack with a wood floor cleaner. Dry the space thoroughly with a soft cloth. Remember: any dampness will prevent the putty or caulk from adhering properly, so wait until the space is completely dry before proceeding.
After the floor has been cleaned, it's time to repair the crack. Push a small amount of wood putty or caulk into the crack until it's filled, using the putty knife to smooth out the top so that it's level with the surface of the floorboard.
Allow the putty or caulk to dry, and then sand the surface to ensure that it's flush and there aren't any bits of putty or caulk sticking up from the repaired area. Wipe away the dust created by the sanding part of the process with a damp cloth.
Pro Tip: To make the repair blend seamlessly with your existing wood floor, use putty or caulk that matches it in color.
Dings and Dents
Sometimes, hardwood floors get dented. Whether you drop something heavy on them, have a dog that likes to "dig" at the boards, or you simply step a little too hard on a weak spot, those dings or dips in the boards need to be fixed. This is one repair that you can do on your own. You won't even have to resort to replacing the entire piece of flooring.
What Do You Need To Fill in Dents?
Depending on the depth of the dent, you have several repair options to choose from. You can either try to raise the wood fibers so that they go back into place (which is great for shallow dents) or use a dent filler (best for deeper ones.)
The supplies that you'll need depend on the method of repair. For example, raising the wood fibers requires a damp cloth and a clothes iron. Dent filler is a bit more labor-intensive, so you'll need:
- The filler itself
- A putty knife or trowel
- Sandpaper
- A damp cloth
Either way, you'll have to start by cleaning the floor, so make sure that you also have:
- A bucket
- Mop
- Floor cleaner
- Some dry cloths
The Repair Process
Start your repair by cleaning the floor. Once it's fully dry, take the next steps. If you're trying to raise the fibers, place a damp cloth over the dent and the iron (plugged in and fully heated) on top of it.
Let the iron sit over the dent for several minutes before removing it and the cloth. Check the dent and repeat as needed until the dent is filled.
If you prefer to use dent filler instead, make sure that you choose one that matches the color of your wood floor. This saves you a step. After the floor is cleaned and dried, squeeze the wood filler into the hole.
Once it's filled, use the putty knife or trowel to remove any excess, leaving the filler flush with the rest of the floor. After the filler dries, sand the area smooth and wipe away the dust with a damp cloth.
Not So Simple Scratches
Scratches are hard to avoid. Even the best-kept floor can get scratched by pets, foot traffic, or someone who decides to drag heavy items like furniture along the floor. These scratches can sometimes be buffed out, although you may have to resort to some additional methods to eradicate them from sight.
Getting Rid of Those Scratches
Always start by cleaning and drying the area of the floor that you'll be working on. This keeps dirt and debris from ending up trapped in the repaired area, as well as prep the surface so that your repair methods stick.
You can use a wood floor crayon or marker (sold in the same colors as many types of wood) to make the scratch disappear. Just smooth the crayon or marker over the scratch as many times as needed until it is no longer visible.
You can also sand out the floor's finish in that area with fine-grit sandpaper, following up with a coat or two of matching wood stain and topcoat.
No matter which option you choose, those scratches won't plague you any more.
Need To Replace Floorboards?
In some cases, the damage to your floorboards may be too severe for a simple repair. For example, if your boards are bent or bowed, are subject to an uneven subfloor, or have large dents that are too much for floor repair putty or caulk, then it's time to replace the floorboards.
It's always handy to have extra boards on hand, although if you don't, they are easy enough to get from stores like us at Hardwood Bargains.
Replacing hardwood floor planks requires a few additional steps than the other repairs listed here, but it's still something you can do on your own, as long as you have all of the right tools. For this repair job, you'll need a circular saw, a ruler and pencil, nails and wood glue, a hammer, and some stain and topcoat, as well as a paintbrush.
Making Your Floor Look New Again
Start by cleaning your floor. Then, cut out the damaged floorboard with your circular saw, taking care not to damage any nearby boards in the process. Once the piece has been removed, cut your new board down to size, marking and measuring it as needed.
Place the new board into the hole, hammering it down to ensure that it's fully inserted in the space. Use floor nails to hold it in place or some wood glue as needed to keep it from moving around. Then, stain the new board to match the rest of the floor and apply the top coat once the stain has dried.
Now your wood floor looks as good as new!
Repairing Your Hardwood Floor
Like other types of floors, hardwoods are prone to damage. However, since they're designed to last for decades, if not longer, these floors are easy to repair.
Whether you're dealing with a crack in a board or in-between boards, dents and dings, scratches, or even issues that require the use of an entirely new board, you can make those repairs yourself.
The trick to making your floors look new again is to ensure that your repair efforts end up matching the existing floor entirely. This means that you'll need to find the right stain, wood floor crayons or markers, or putty and caulk that matches.
It may take a little extra time, but the end result – a perfect-looking floor – will be totally worth it!
Sources:
How to Fix a Crack Between Hardwood Floor Planks | SF Gate
How to Fix Dents in Hardwood Floors for Beginners | Rhythm of the Home
9 Tips for Removing Scratches from Wood Floors | Bob Vila
Hardwood Floor Repair: How to Patch a Hardwood Floor | Family Handyman
