When admiring a beautiful hardwood floor, it can be easy to forget that once upon a time, that living room, bedroom, or bathroom, may have been covered in something entirely different.
Perhaps it rocked an orange shag carpet in the 1970s that eventually grew out of style (or didn’t, we don’t judge). Maybe the kitchen went through decades of chipped tiles that bore the brunt of spills and drops, the movement of new appliances, and the footsteps of generations.
Either way, someone laid down each board of hardwood to complete the look you see today, and they may or may not have done so masterfully. Luckily, with our help, you will be an expert on hardwood flooring installation in no time.
Flooring Installation Basics
Before we can jump into the specifics of flooring staples, you need some background knowledge on the particulars of floor installation.
Your initial decision is deciding the type of floor you intend to install, particularly evaluating what type of hardwood you are looking into. If you have a busy home with numerous pets or young children who play on the floor and run around, a wood higher on the hardness Janka Scale is preferred. However, if you’re looking for a softer feel in a closet or small area, feel free to explore options that are lower on the Janka Scale.
Prior to installing the wood you chose, make sure that you take apart all of the products that have been delivered. Even if you are renting tools, look carefully at what you have been given. Broken planks of wood, warped wood, or subpar equipment can seriously derail any installation process and ultimately end up costing you more money than you were planning on spending.
As we’ve pointed out before, warranties usually lose their value once hardwood has been put in place. Ensure that you can reclaim any damages before you pour your labor into this job.
Choose the Process
There are two types of installation: a professional and a personal approach. We’re catering this tutorial to an audience of adventurous folks who enjoy the DIY lifestyle, but there is no shame in needing help. Just be mindful of the price of the labor of others by the hour or by the workload.
If you are using solid hardwood for your floors, installation of popular woods like naturally finished white oak and tigerwood can cost you $12 to $14.50 and $16.50 to $20.15 per square foot, respectively. That said, when a professional installs your floors, they typically guarantee that you won’t need to fix any errors for many years, so this option can end up being quite cost-effective in the long run.
Prepare for Work
If you go the DIY route, naturally finished white oak can cost a comparable $8 to $12 per square foot for installation. This does not include the money it takes to acquire all of the tools necessary, like a floor stapler, compressor, and various saws. If you plan to use a miter saw, find one with a blade of about 80 teeth, as solid wood can be tough to cut.
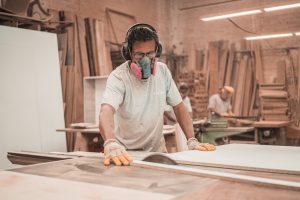
You will also need safety glasses, gloves, brooms, a vacuum, and a table saw regardless of the type of wood you choose. We recommend investing in a stapler with an 18 gauge and anything over a 1 ¼” staple.
Humidity Matters
Keep all of your engineered wood materials in the room where you’re installing them for at least two days before the final process. If you fail to do this, the temperature and humidity of a room may ruin the balance of the wood. The perfect temperature is anywhere between 60 to 80 degrees Fahrenheit. Aim for humidity that does not exceed 55% or fall beneath 35%.
Any work that has been done on the room recently, such as painting or plumbing, needs to be completely finished before installation. Moisture can seep in from this work and sabotage the humidity and, in turn, the wood.
Subfloor Starts
If the base of your floor is concrete, you are in luck. The work here is typically easy in terms of preparation, only requiring you to sand down any dips and patch up areas that are not filled in.
Concrete floors that create powder when you scratch them with a metal object can only be covered with engineered hardwood. Make sure that the wood can fit underneath a door jamb casing by placing a temporary piece underneath each one.
Another preventative measure against excessive moisture seeping into the flooring comes from the stapling of builder’s felt about half an inch away from each wall in the room, 4 feet apart from each other. This prevents mold growth as well. Your wood is now ready to be installed.
If your subfloor is wood rather than concrete, lay down a 6-mil polyethylene layer before installing. This does the same job to wick away moisture.
Engineered Hardwood Installation
Engineered hardwood is one of the most common types of flooring out there. It is created by placing small panels of real wood on top of laminated pieces of plywood or similar products. This not only saves you money but can make for a more dependable and longer-lasting floor that is not as prone to knicks and splits as solid hardwood.
Tools Needed for Engineered Hardwood Installation
You will need a basic and miter saw, a jigsaw, builders felt, a tape measure, a rubber mallet, a straight edge, and of course, your stapler.
Steps for Success
After the builders felt is stapled down, lay your first course of hardwood alongside the longest wall in the room.
If you are using tongue and groove boards, your job should be fairly simple—think of it as a puzzle. Place the tongue side of the plank on the outermost part (opposite the wall) and staple through this tongue directly into the sub-floor. Make sure to use a 45-degree angle, and ensure that your compressor PSI is at 80-85lbs to avoid shattering the tongues. You can fill expansion gaps with spacers along walls that are ½ inches over which baseboards can go.
From there, continue with staples in the planks of wood 6 to 8 inches apart. Keep them 1 inch away from the wall.
Sometimes, you can exchange floor staplers for floor guns with nails, and the process is similar. This works best in small spaces, and you will have to learn about face-nailing and bind-nailing, which may be a bit more confusing than stapling.
Place staples or nails in the areas of wood that have a deeper toned grain to disguise them. If you create holes by accident, you can simply cover them with wood filler.
Sheet Vinyl Flooring Installation
Another form of flooring is sheet vinyl, which works best in kitchens and bathrooms. The difficulty lies in formatting it to fit around existing furniture or appliances which cannot be moved. You must create outlined templates of the floor pre-installation to shape the vinyl perfectly.
Tools Needed
You will need safety glasses, vinyl glue or tape, a marker and contractor’s paper for outlines, a tape measure, painter’s tape, and your manual or electric stapler.
Steps for Success
After you have outlined your floor plan, tape the whole thing together and overlay the sheet vinyl. Use a utility knife to cut it down.
Smooth the vinyl on top of the floor and staple every 2 inches along the walls of the room. Staple within the perimeter of the expansion edges. You can then cover the staples with baseboards so that the middle of the sheet vinyl is free on the ground, much like a floating floor.
Expert Opinions
At Hardwood Bargains, we are here to help. In 2018, 70% of our product sales were engineered hardwood, and we have the tips and tricks to make your installation process (mostly) painless. Don’t hesitate to reach out with questions and concerns, as well as peruse our offerings for tools needed as well.
Sources:
Solid Hardwood Flooring Installation Costs: Professional vs. DIY | The Spruce
How to Staple Sheet Vinyl Flooring | The Spruce
How to Install Hardwood Floors Without a Pneumatic Stapler | SF Gate
