There’s nothing worse than finding out that your laminate floor has been damaged. Small issues, like scuffs and minor scratches located around the sides of your floor or near the walls, can be covered up with furniture or simply ignored since they are difficult to see. However, those in high-traffic areas and the middle of the floor will need to be repaired as soon as possible.
Repairing your laminate floor depends on many factors, including the type of damage. The tools you need to use also depend on this since a scratch is treated differently from a gouge in the wood or a huge crack. With that said, laminate flooring is easy to repair if you know how, so here are some tips and tricks to get you started.
What Is Laminate Flooring?
Before you dive in and start repairing your laminate floor, it’s crucial to understand exactly what it is. Since laminate is different from hardwood, it needs to be treated differently. Laminate mimics the look of a hardwood floor, even though it is made of multiple layers of natural and synthetic material. People love laminate because of its affordable price: it costs less than traditional hardwoods, and laminate is easy to repair as well.
Laminate flooring consists of a base made of particleboard or pressed wood that is then topped with a thin piece called the image layer. The image layer provides durable protection against damage, including sun damage.
This image looks exactly like hardwood, so the floor resembles this more expensive option without the cost. On top of the image layer is a thin, clear layer that provides protection and adds some shine to the floorboards.
When you look at a hardwood floor side by side with a laminate one, it can be hard to tell the difference at first glance, which is why people choose laminate. Since the materials are different, the ways to repair laminate differ quite a bit from the methods used on hardwoods. It’s important to know how to repair your laminate floor.
Determine the Extent of the Damage
The first step in fixing your laminate floor involves examining the damage. Ask yourself questions like, which board is damaged? Where is the damage located? Is the problem a deep crack that will involve replacing the entire board? Or can you fix the issue with a simple patch from a laminate floor repair kit?
Taking the time to examine the floor and the damage will help you with the next steps. Remember not to rush the process; haste makes waste, as they say. In order for your floors to look as good as new when you’re done, you’ll need to take your time and tackle the repair correctly.
In the end, you’ll be happy that you took your time once your floor looks as good as new.
Gather Your Tools
You’ll need everything from a circular saw to a laminate floor repair kit, depending on the damage. A laminate repair kit consists of multiple shades of putty, wooden sticks for mixing, a floor repair marker, a putty knife, and more. These kits are good for fixing small scratches, removing minor surface gouges, and covering up large scuffs.
If your floorboard is so damaged that it needs to be removed, then you’ll need that circular saw, another floorboard, a small knife to remove any glue, and a new container of glue to hold the new piece of flooring into place. Whether your laminate is the snap together type or the non-snap together type, this method will work.
Repairing Minor Damage
Minor damage is fairly easy to fix, thanks to a laminate floor repair kit. These kits are designed for minor problems of all types and contain everything you need to make your floor look new and dashing once again.
Here are the steps for minor damage:
Step 1 – Clean the Floor
The putty or wax won’t hold if the area surrounding the damage is dirty. Clean this area of the floor well and dry it thoroughly before proceeding.
Step 2 – Cover the Scratch
Using the flooring marker that came with your laminate repair kit, color in the scratch. Allow the marker to dry fully (this takes around an hour) before examining your work.
If the color is still too light and the scratch is still very evident, reapply more ink and allow it to dry. You may have to do this several times before the job is done.
Step 2 (Alternate) – Repair the Gouge
If your floor has some gouges in it, as opposed to light scratches, you’re going to have to use putty. Floor putty comes in many different colors, but you may find yourself having to mix a few shades together in order to perfectly match your floor. If this is the case, mix your putty in a disposable cup using a wooden stick.
Once your floor putty is the right shade, place a small amount of it on your putty knife and apply it to the gouge. Your goal is to fill the gouge entirely so it disappears. You may find yourself running your putty knife over the top of the filling to make it flatten and to get any extra putty off of the nearby undamaged floorboards.
Patience is key here. Allow it to dry for an hour once you’re done.
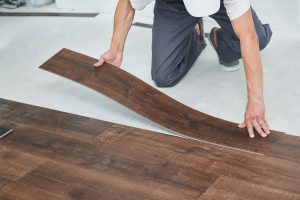
Replacing a Damaged Plank
Damage that’s too deep for a simple repair requires something a bit more labor-intensive: a new plank. Get a new laminate wood plank that matches your existing floor, so you can remove the old one and put the new one in its place so that the repair appears seamless.
Start the repair by cutting out the area surrounding the damage. You’ll need a circular saw with the depth set to cut through the laminate, but not the subflooring.
Use a straightedge to draw your lines so that they are straight around the edges of the damaged plank without touching any of the undamaged ones. Once you have your dimensions in place and lines drawn, use the saw to cut the damaged area out.
At this point, you may have to pry the damaged board out of its slot because the glue used to hold it in place is usually still intact. Carefully use a tool with a flat edge to pry the board out, starting with one side before moving on the others. Take your time so as not to damage the boards surrounding it.
Once the board is out, use it as a template to cut your new board into place. Before you install it, you may have to remove any glue on the subfloor or the edge of the existing planks on either side if they are the type of flooring that snaps together. Once the glue is up and the area is cleaned to help the new glue stick, you can move on to the next step.
Place a thin layer of new glue in the area (either on the grooved planks or the subfloor), and place your new board over it. Use a hammer to fit it into place and allow the glue to dry.
Repairing a Laminate Floor Can Be a Snap
If you have a laminate floor to repair and need new planks, come visit our amazing team at Hardwood Bargains. We have a wide variety of laminate floor options, ranging from multiple colors and grain patterns, making it easy to find one that matches your existing floor. When you need to make a laminate repair, we’re always here to lend a hand!
Sources:
What Is Laminate Flooring | The Spruce
Laminate Floors: How to Replace a Flooring Plank | Family Handyman
How to Replace a Laminate Floor Board in the Middle of the Floor | SFGate
